Extend your Creativity with the Sigma SD Quattro
Introduction
There are a multitude of reasons why as photographers we levitate towards shooting with a particular camera. Some reasons are logical, some less so, some are conscious that we can rationalise, while others are subconscious and very personal.
For me, photography has always been very much a creative outlet first and a source of income second. And I realise that a big reason for my choosing to keep shooting with the SD Quattro is because it nurtures my personal creativity. In this article I would like to touch upon one such avenue of creativity that the SD Quattro and SD Quattro H open up to the photographer that is quite unique to these mirrorless cameras.

Infrared radiation is invisible to our eyes but it is all around us. It is generated mostly by the sun, but also by certain artificial lights and by heat sources. Unlike our eyes, every digital camera sensor is highly sensitive to infrared radiation, but this radiation is interpreted by the sensor mainly in the red channel and so will cause very unnatural looking images unless it is filtered out. Camera sensor manufacturers achieve this by permanently fixing in place a special infrared blocking filter directly on top of the sensor to prevent infrared radiation from entering. This filter is commonly called a “hot mirror” due to its reflective surface and the fact that it helps prevent heat build-up.
I have put together a short video demonstrating how to remove and re-fit this filter here:
Sigma SD Quattro IR Preparation from Tim Shoebridge on Vimeo.
Sigma and Foveon have decided not to follow the approach of a permanently fixed hot mirror. Instead they have designed a removable IR blocking filter that is right at the mouth of the lens mount on both the SD Quattro and SD Quattro H. With a little practice you will find it very straight forward to remove and re-fit this IR blocking filter.
Once the IR blocking filter has been removed you have two basic approaches; you can simply capture images with no additional filtration in place or you can fit filters to block out certain wavelengths of light and achieve different effects. Infrared photography falls into the second approach that I have just described, whilst the first approach with no additional filtration is full spectrum photography. Let’s talk a bit about full spectrum photography first.
Full Spectrum Photography
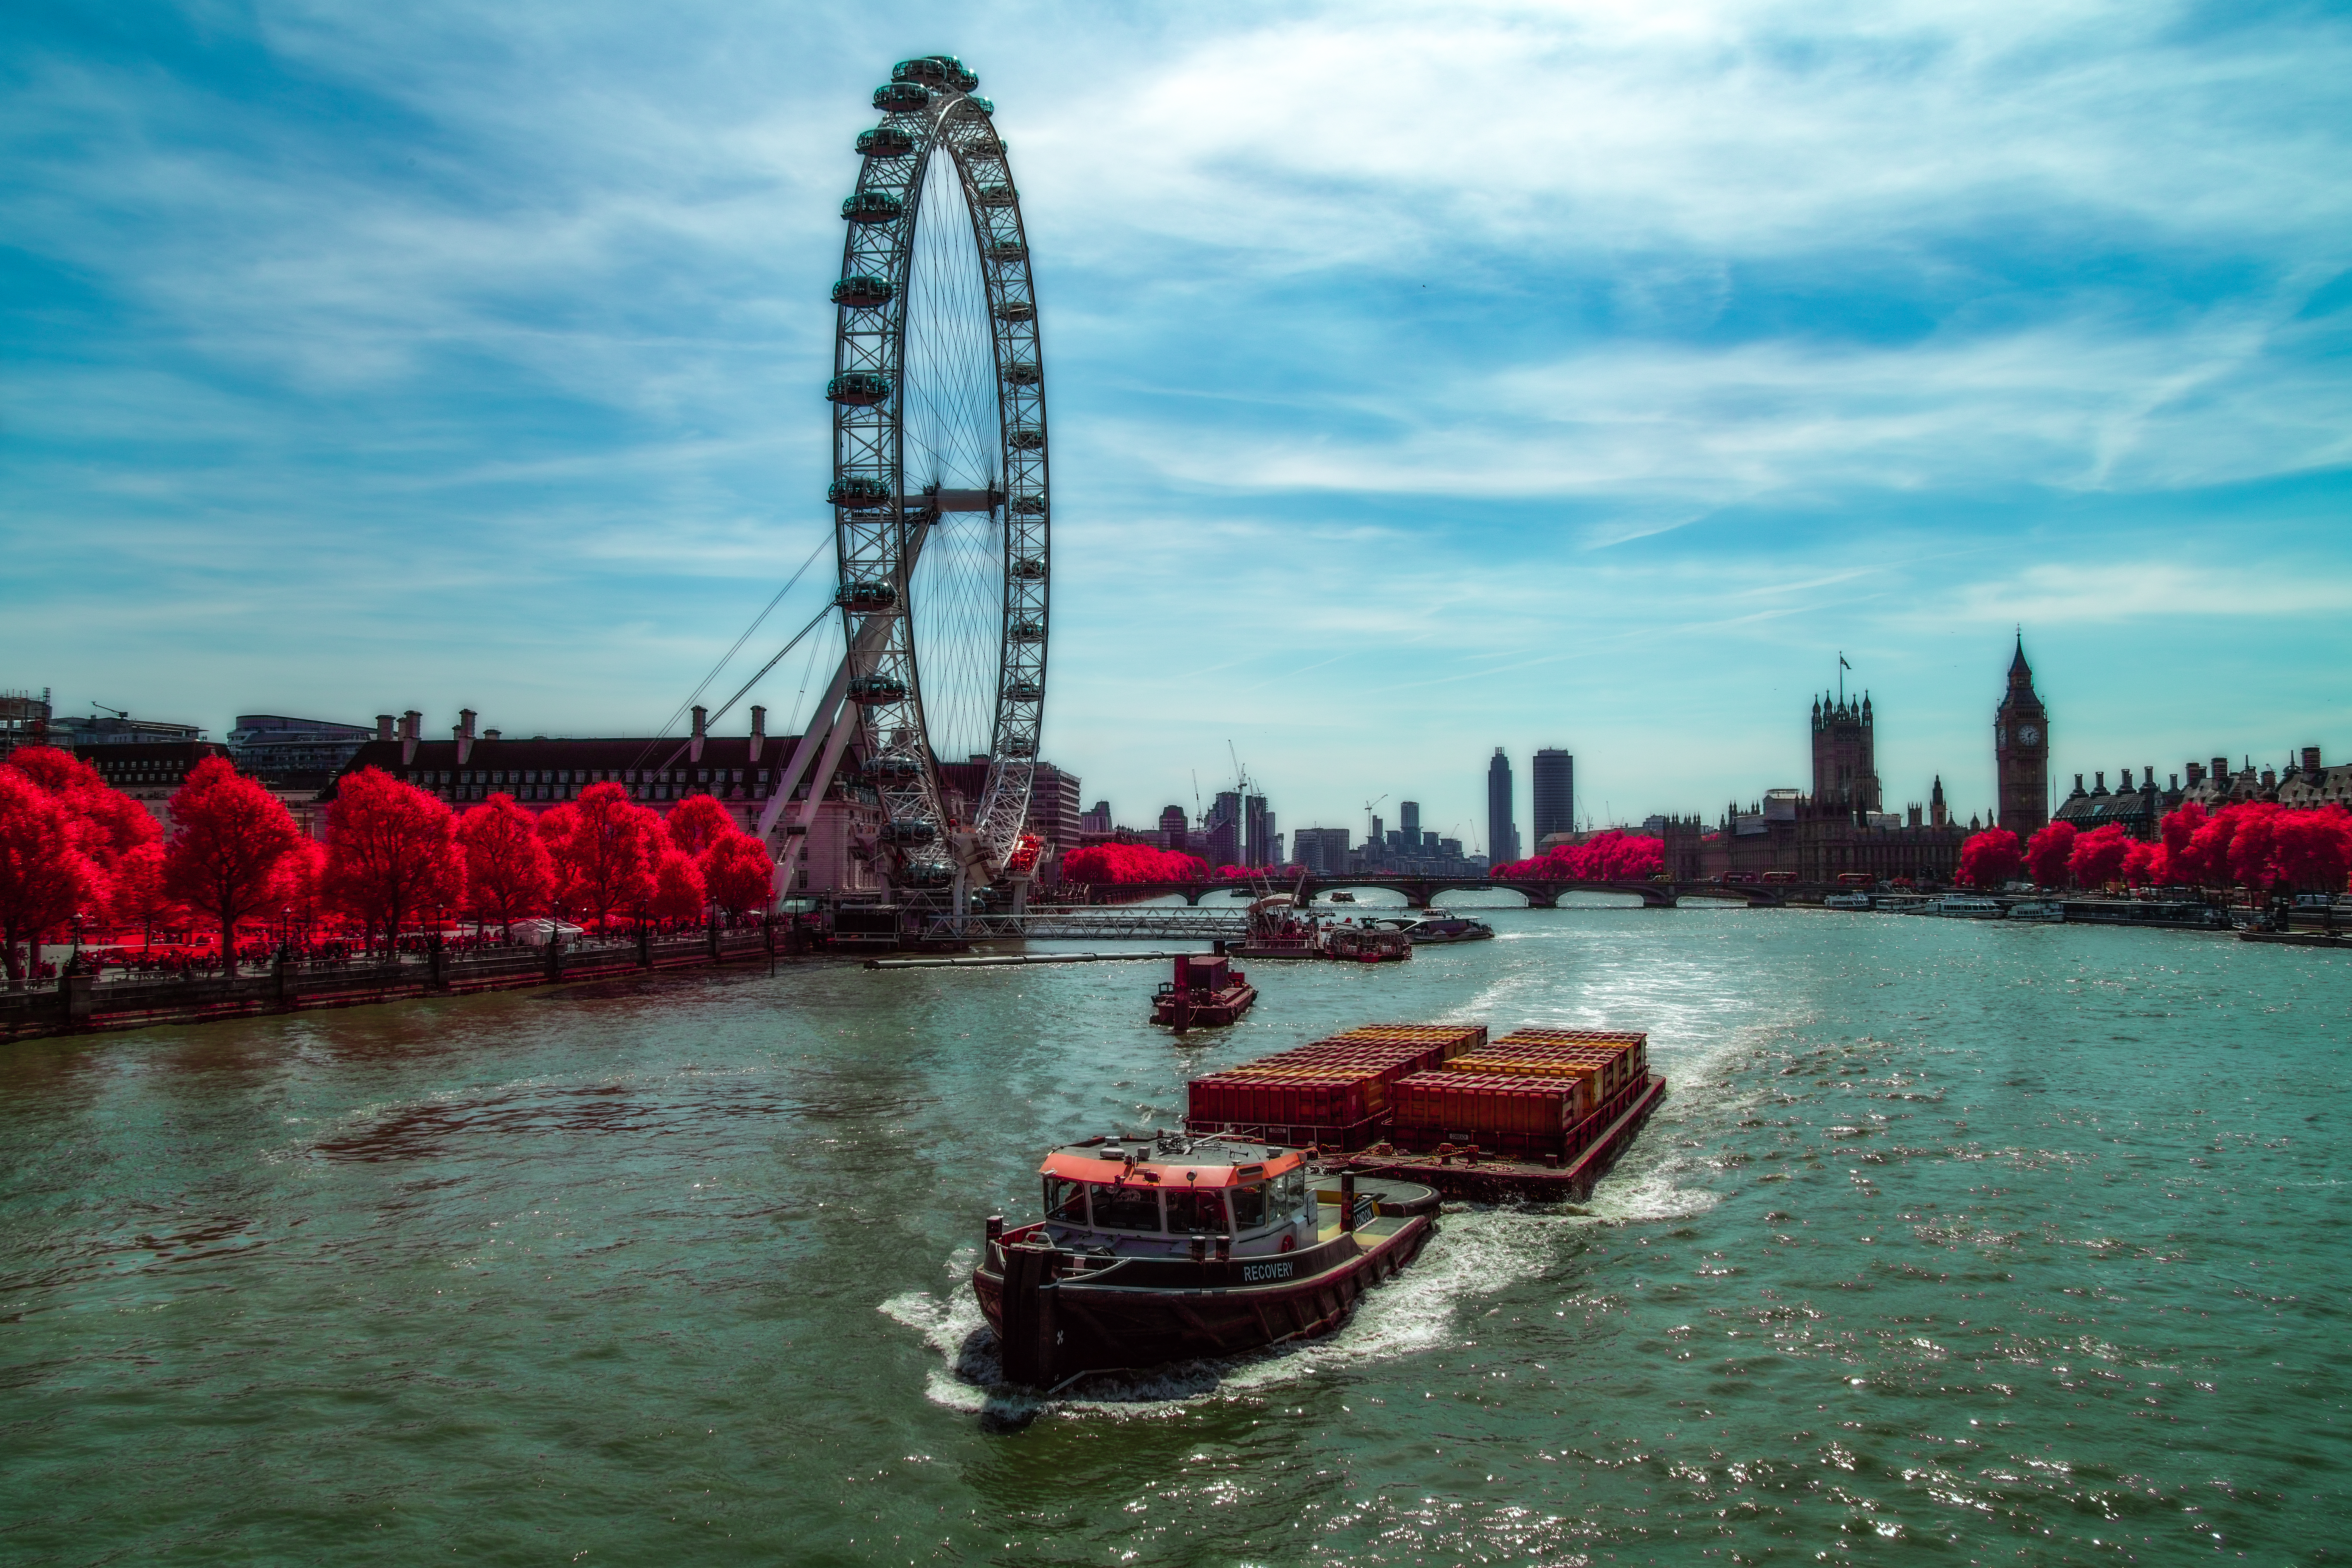
Capturing a colour image of an everyday scene without the IR blocking filter in place will open your eyes to just how much infrared radiation there is and how many materials and surfaces are reflecting it.

All green foliage, whether a field of grass or leaves on a tree are all highly reflective to infrared. From experimentation you will also observe that most of our clothing also reflects infrared radiation which is a property of the artificial materials and dyes that we use.
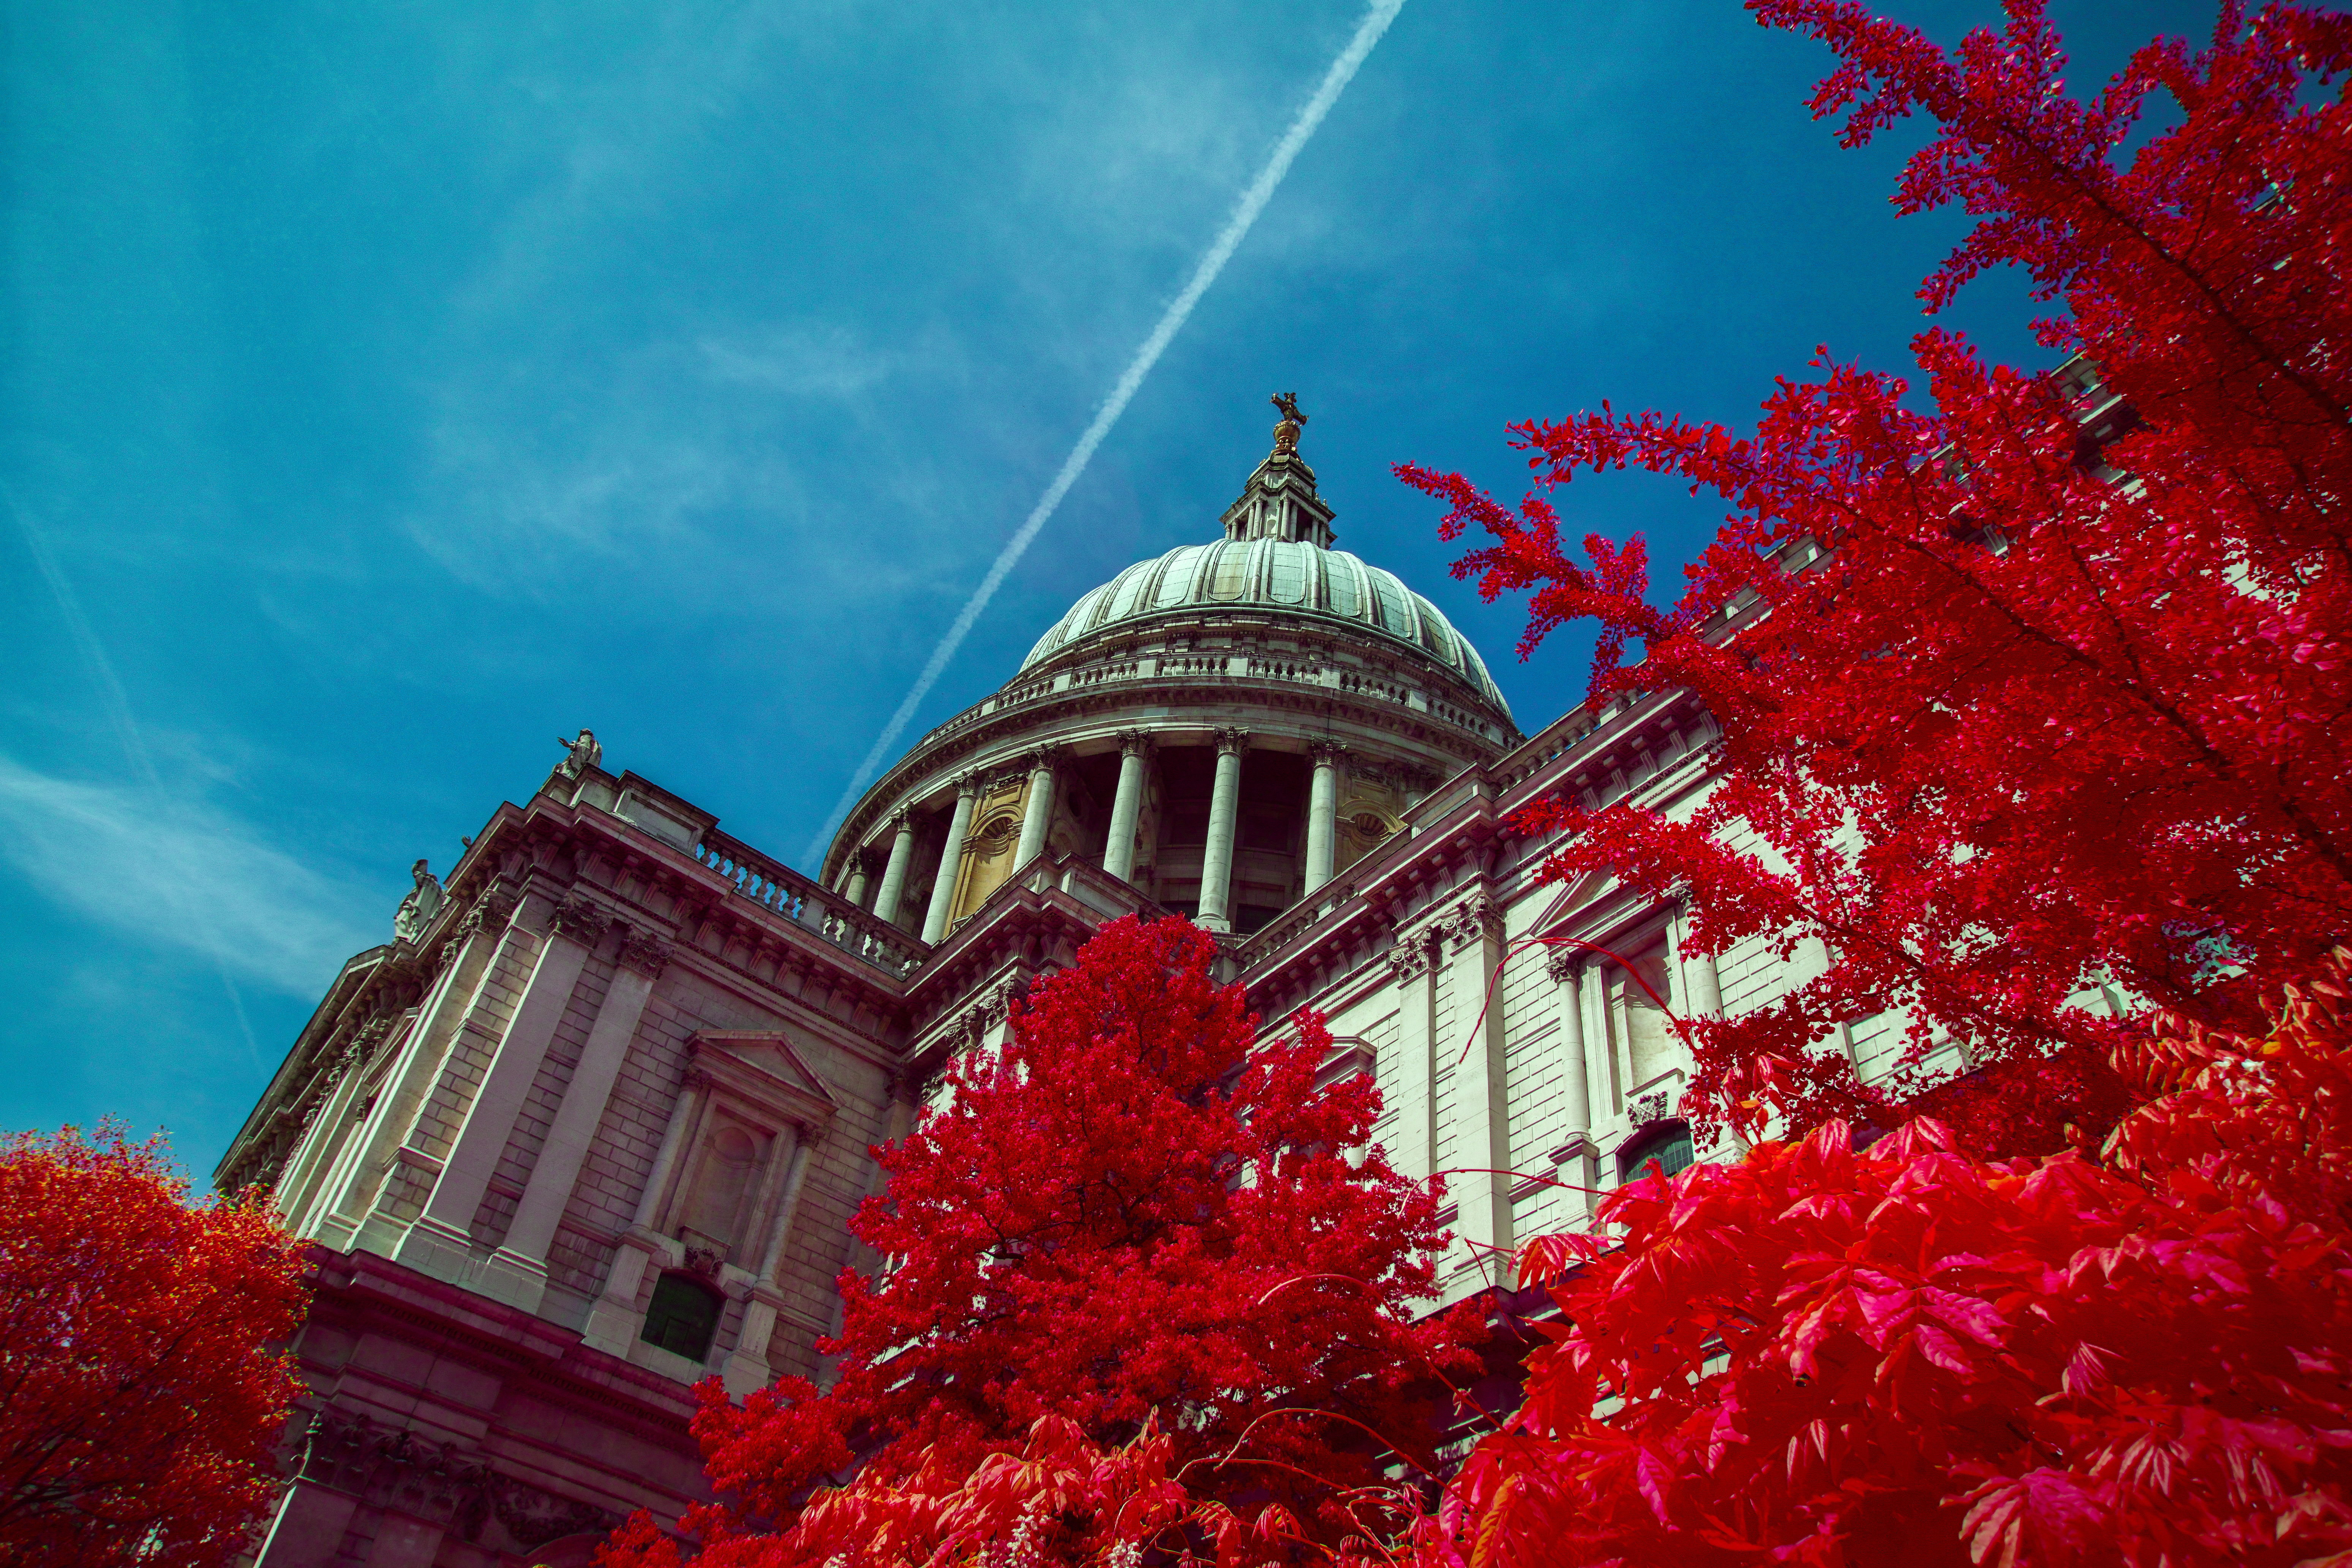
The world around us looks very different when we make infrared radiation visible in our photographs and full spectrum colour images will predominantly be red. Images of familiar landmarks help to accentuate this unworldly alternative view.
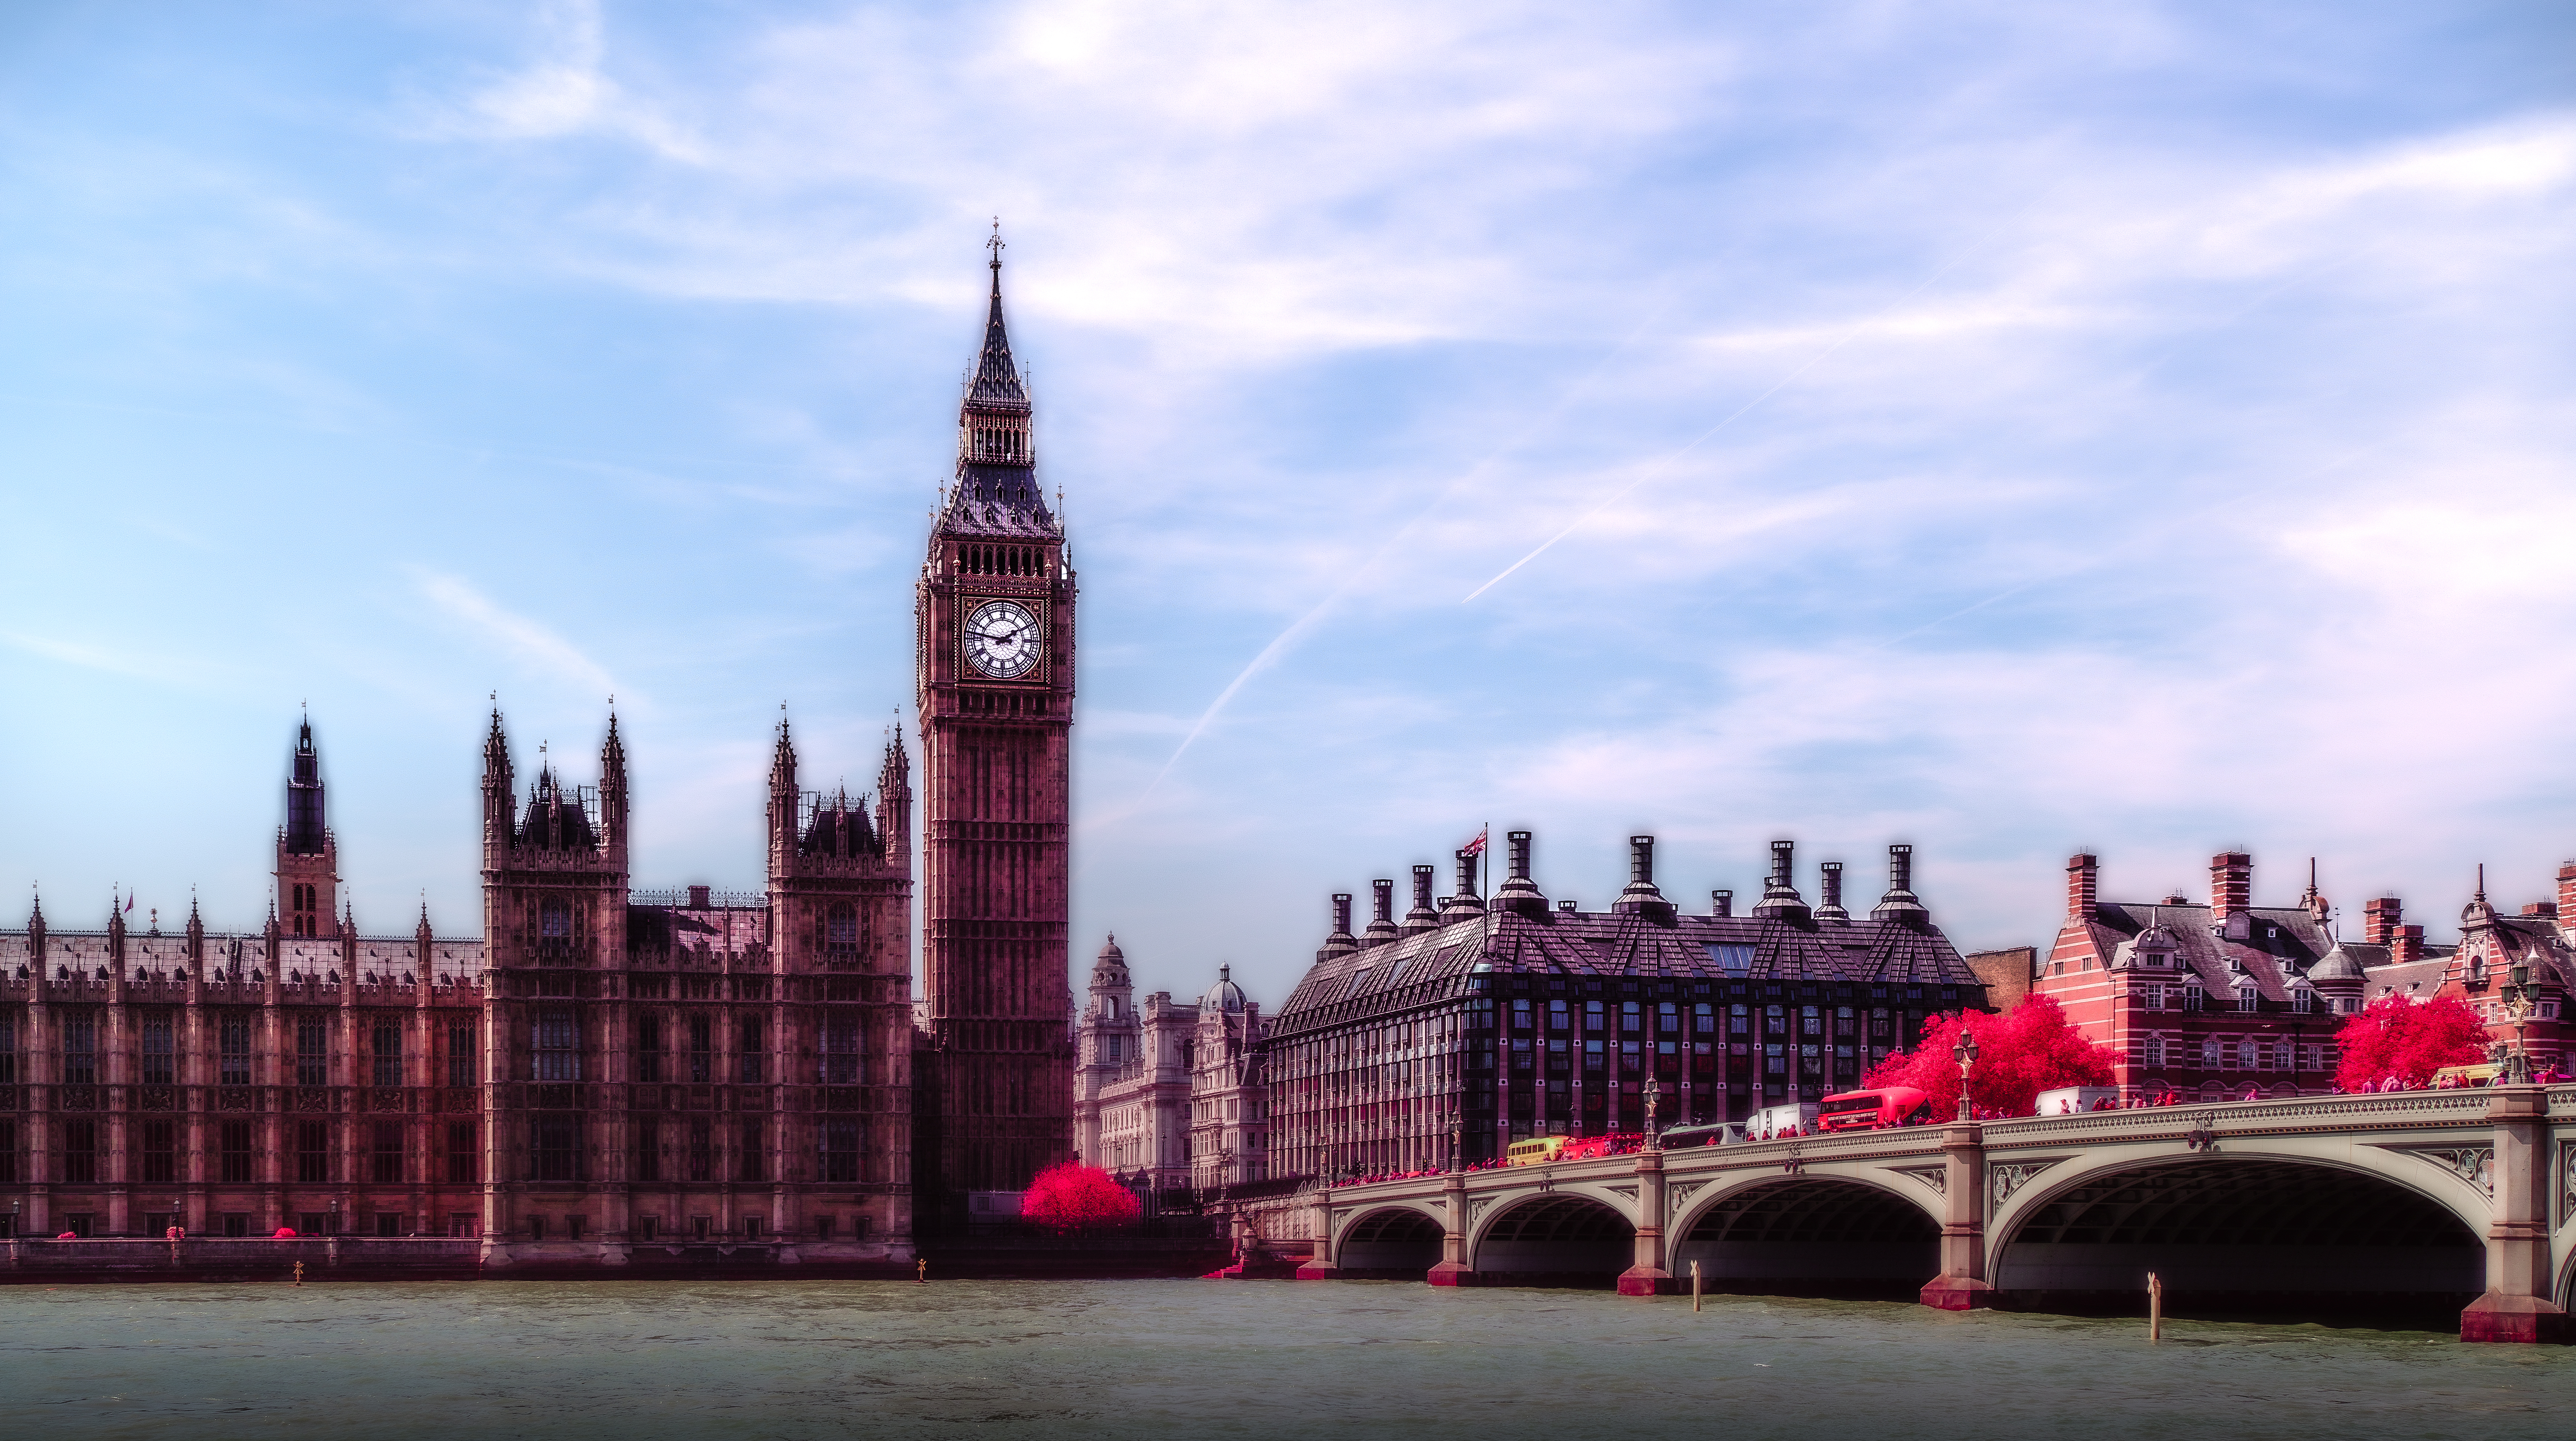
After a few hours of shooting, I found the novelty of mainly red images was starting to wear off and I found myself looking to take images with a different look. As I started to play with the SD Quattro’s white balance and colour mode settings I realised that you can achieve a very wide range of effects and colours in camera with next to no post processing needed.
The SD Quattro does not have a preset white balance setting that really suits full spectrum photography and its auto white balance function is programmed to expect only visible wavelengths of light and not infrared ones. However the custom white balance setting works really well with full spectrum photography, you simply point the camera at something predominantly grey and neutral, record an image and the SD Quattro will set a white balance that is a great starting point for your creative experimentation. In the image below I used the tarmac path as the subject of my custom white balance setting:
Infrared Photography
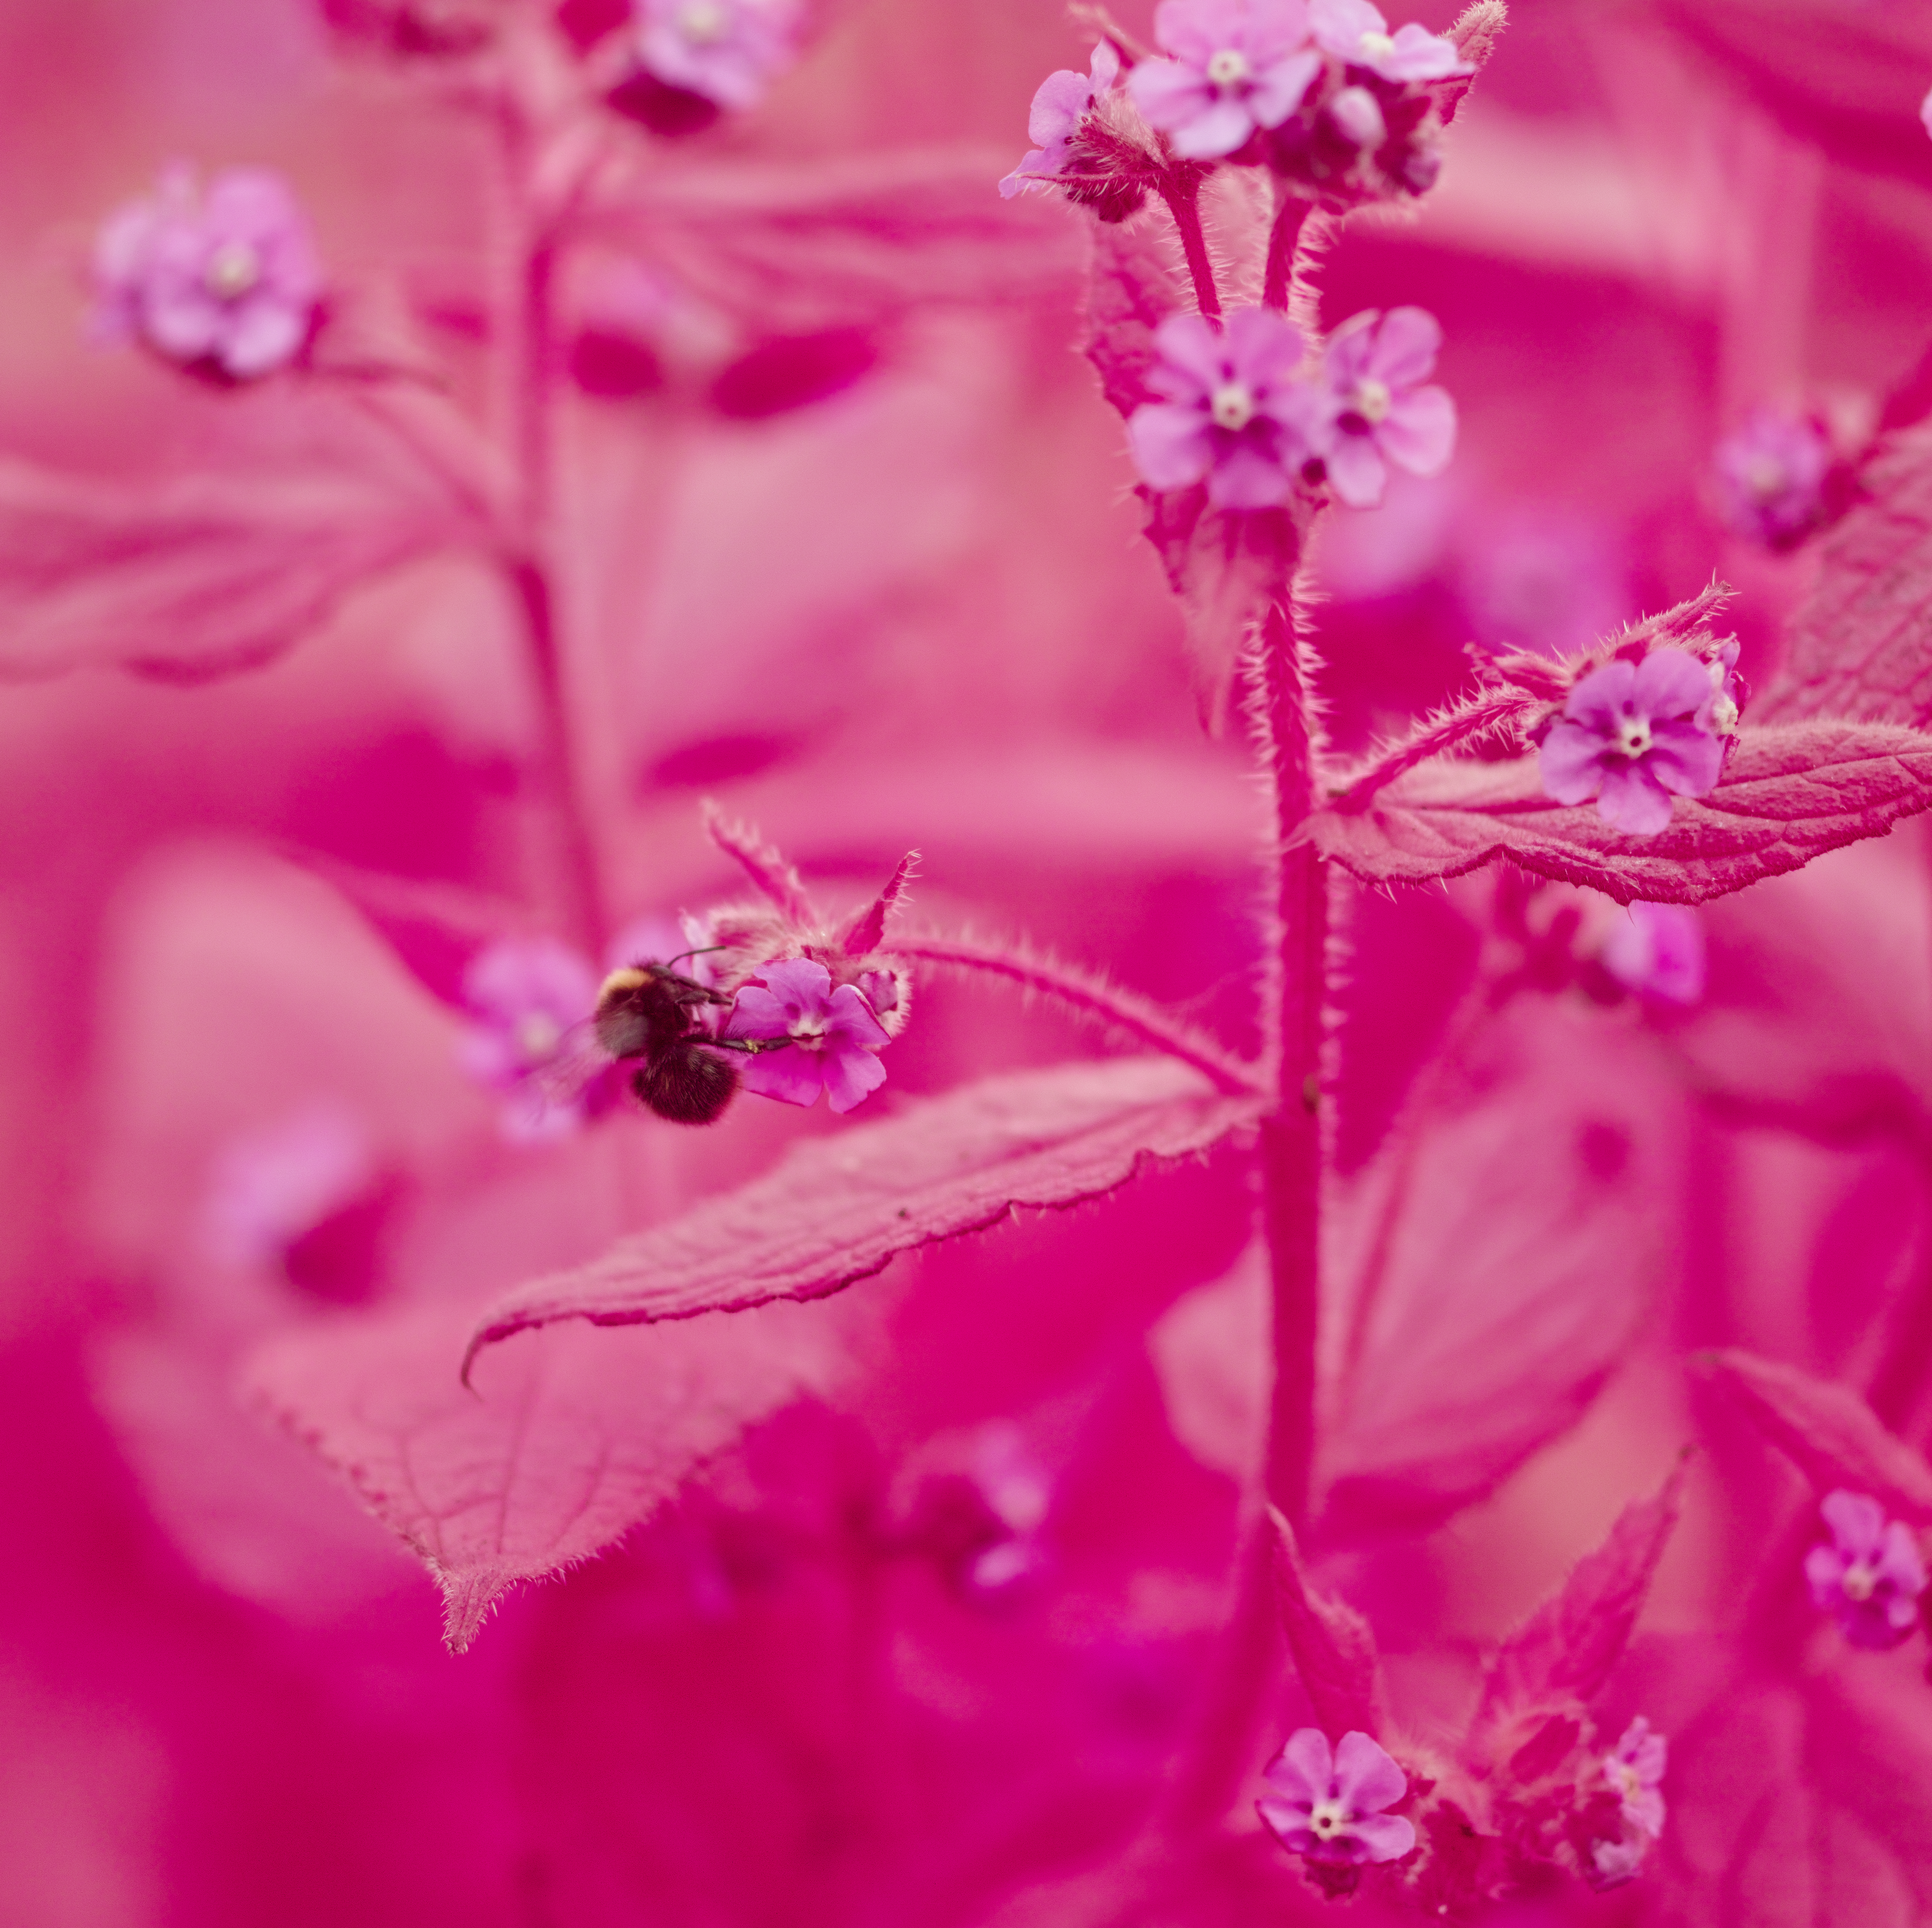
Next lets talk a little bit about infrared photography. With the SD Quattro’s IR blocking filter removed, the sensor will receive both the visible light spectrum plus infrared radiation all together. Infrared photography is the capturing of infrared radiation only and is achieved by placing an infrared filter on the front of your lens. Such a filter will look black and almost completely opaque since it only lets through infrared radiation and will absorb visible light. There is a spectrum of infrared radiation, a whole range of wavelengths rather than just one, and there are a variety of filters that you can apply that block out different segments of that spectrum to achieve subtly different effects.
With an infrared filter in place, the image viewed through the SD Quattro’s EVF or on its LCD screen will appear as low contrast shades of red since infrared radiation is predominantly recorded on the red channel. There is no way in camera to achieve a balanced range of colours, no preset white balance settings have an effect, neither does auto white balance. And unlike full spectrum photography, the custom white balance option will fail, there is simply too much red and not enough blue or green in the image to achieve any sort of balance.
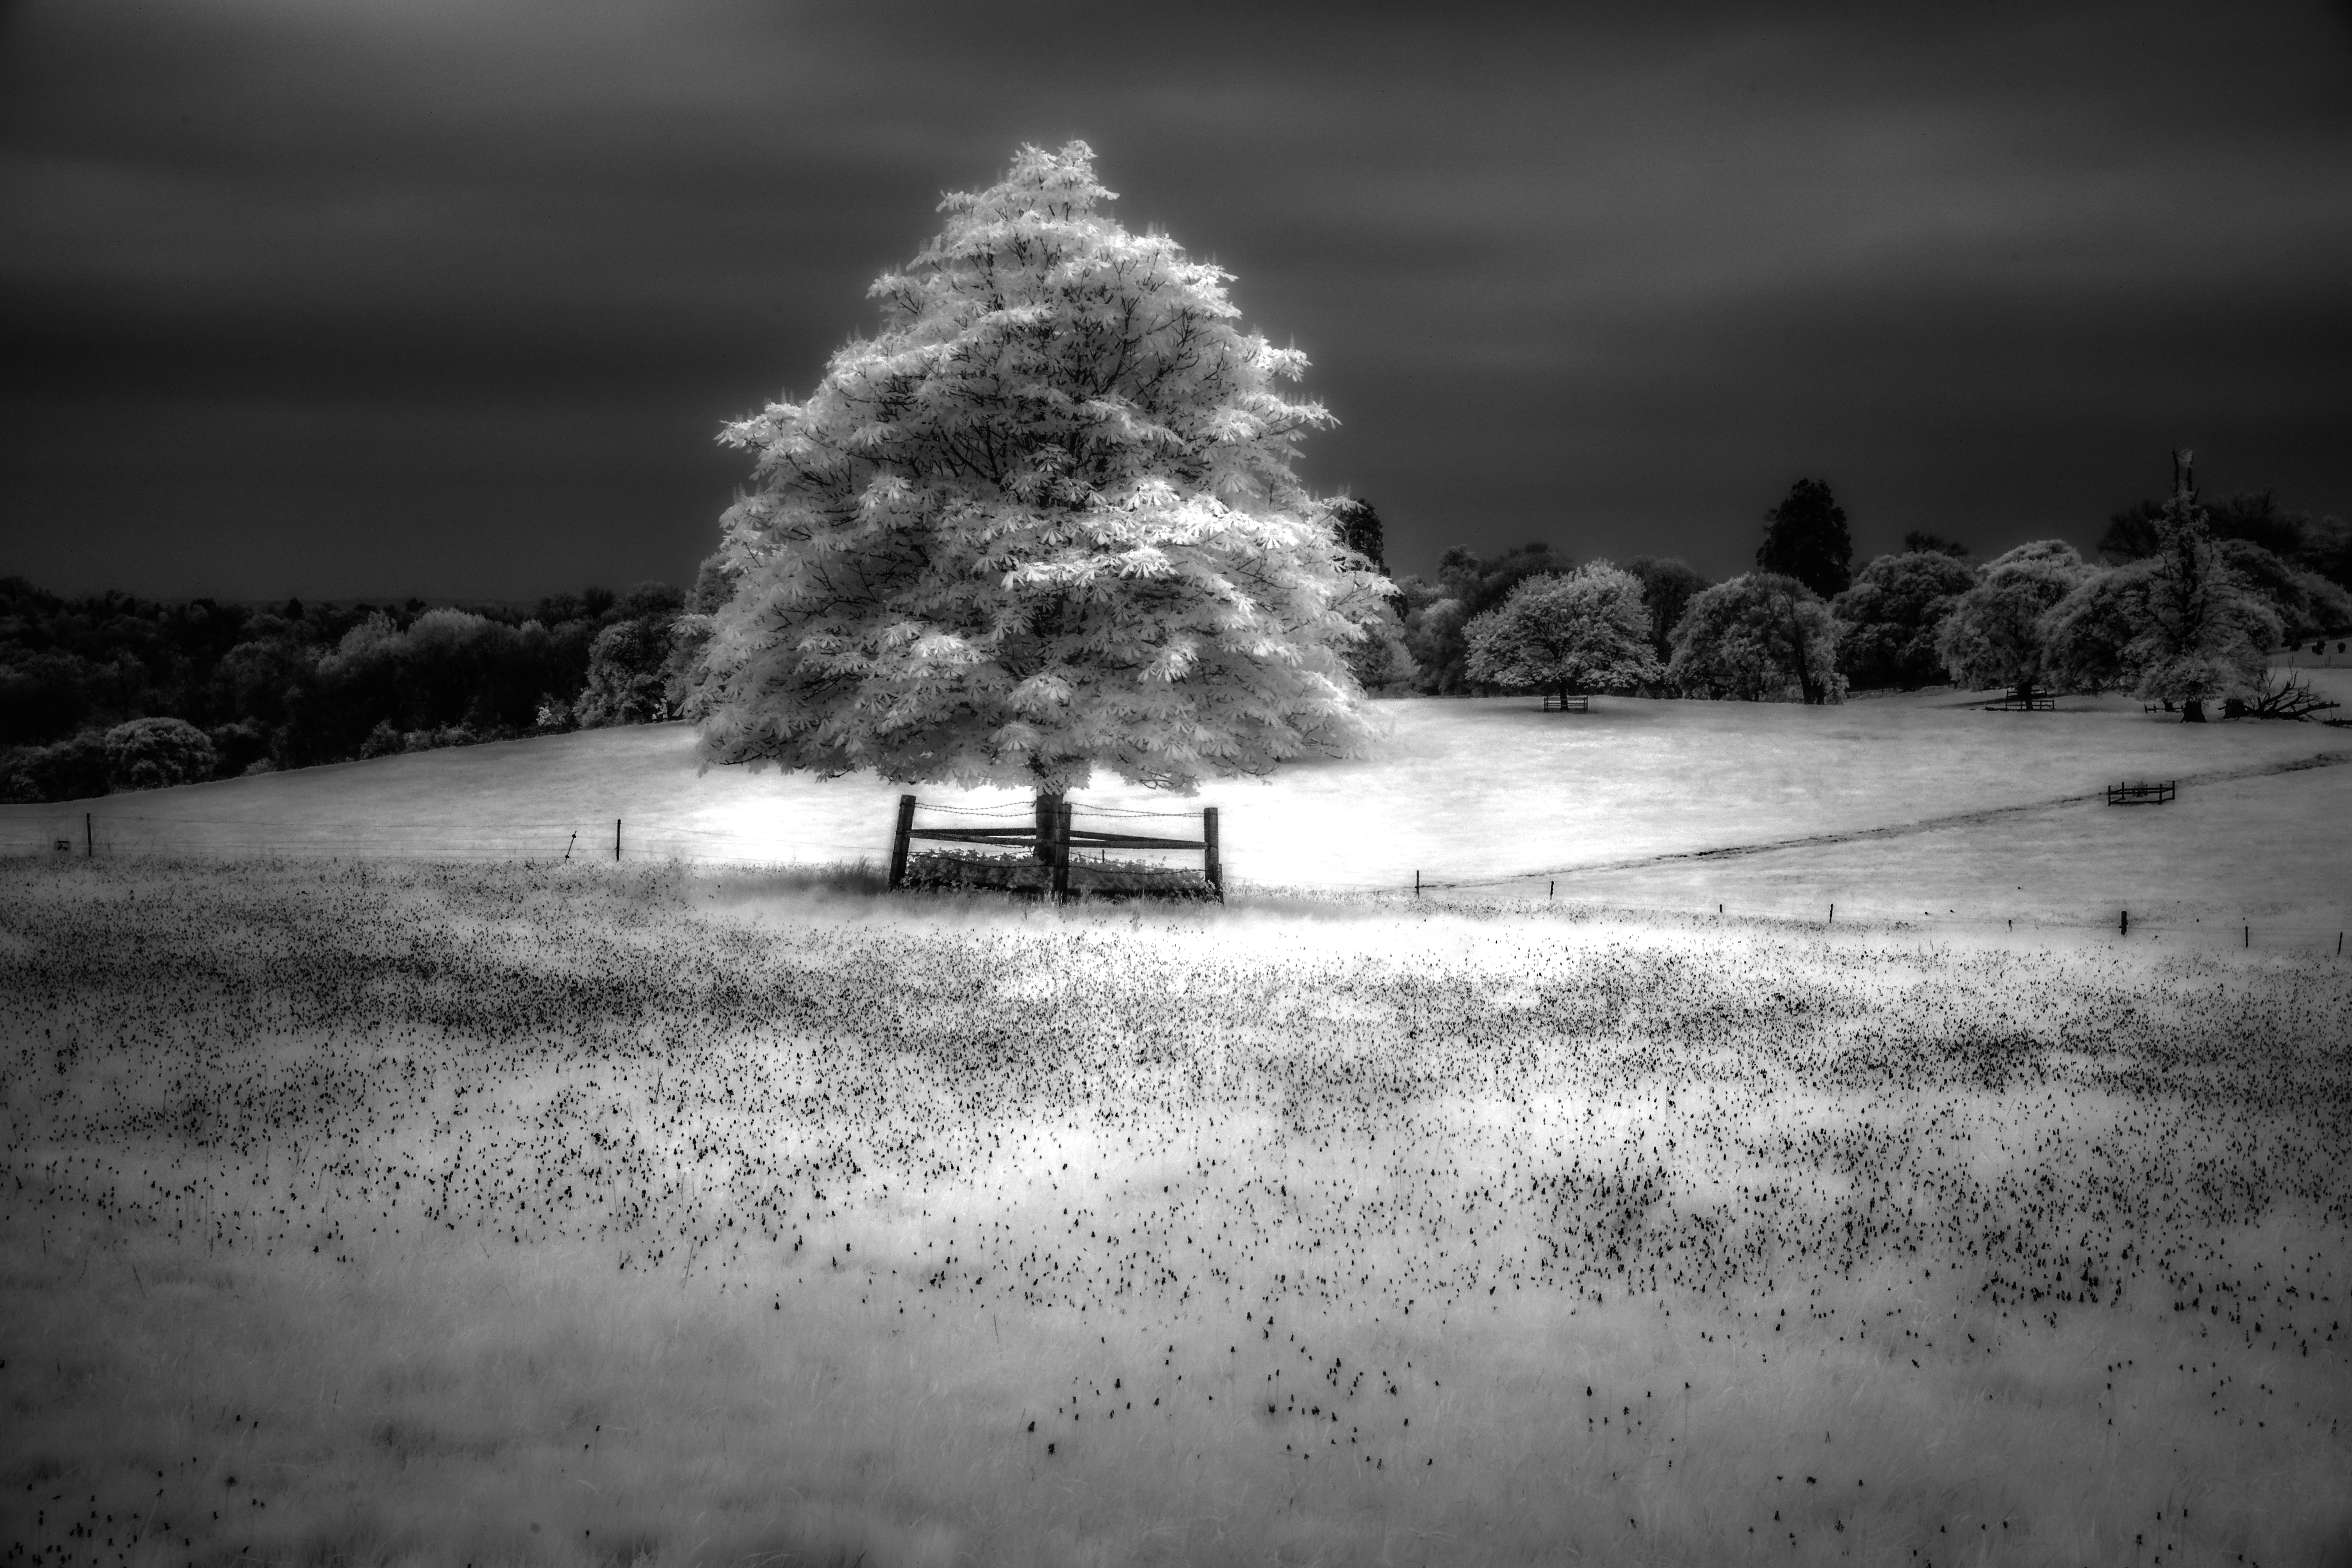
The best option that I have found is to set the SD Quattro’s colour mode to monochrome, and then boost the contrast and set the monochrome filter to red. This achieves the punchiest look and takes the SD Quattro back to the foundations of infrared film photography which was to shoot in monochrome.
I find infrared images to always look nicer in monochrome anyway, they can have a serene quality about them, a strangely natural look. What would otherwise be bright red foliage if recorded in colour now tend towards white and reminds us of a snow covered landscape.
Conclusions
In summary, I think the combination of full spectrum colour images and infrared monochrome images give the best of both worlds: There is a wide range of achievable colour tones when working with full spectrum on the SD Quattro, and of course you have the option to perform post processing, swap colour channels and achieve many alternative colour combinations that way.
And then we have the subtle and delicate monochrome shades that can be achieved with infrared, images are naturally low in contrast but this can be altered in post processing to achieve high contrast bright whites and rich blacks.
The SD Quattro and SD Quattro H allow you to explore all these possibilities simply by removing the IR blocking filter, which is an operation that can be simply reversed at any time to return the camera to its normal mode of operation. No other camera I am aware of in the market today provides this flexibility, and very few have ever had a removable IR blocking filter in the preceding two decades since digital photography was born. The beauty of the SD Quattro over a more traditional camera for infrared photography is that you can always see what you are shooting in the EVF and either manually focus it or take advantage of the camera’s autofocus capability.